Academic Program Review
Steps for Adding and Linking Evidence to a Self-Study in HelioCampus
These are written instructions for uploading evidence and linking to it within your Self-Study Document in HelioCampus. Video Instructions and further information can be found on our Academic Program Review page. You can access HelioCampus by going to rutgers.heliocampus.net and selecting the option to sign in using the Rutgers SSO.
If you have a question about using HelioCampus during your Self-Study, please email otear@rutgers.edu.
1. Adding Evidence to the Self-Study Related Documentation
1. To add a new piece of evidence to the Self-Study, the information will need to be added to Related Documentation. To access the Related Documentation section, open the Self-Study Manager and click ![]() on the right side of the Self-Study you would like to add evidence to.
on the right side of the Self-Study you would like to add evidence to.
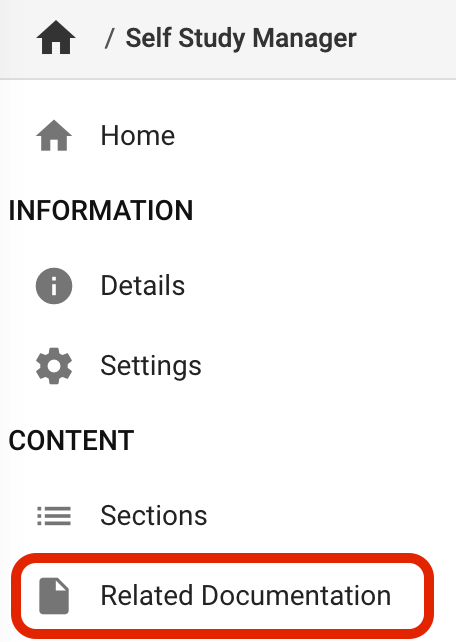
Once the Self-Study is open, the Related Documentation field can be accessed in the left sidebar.
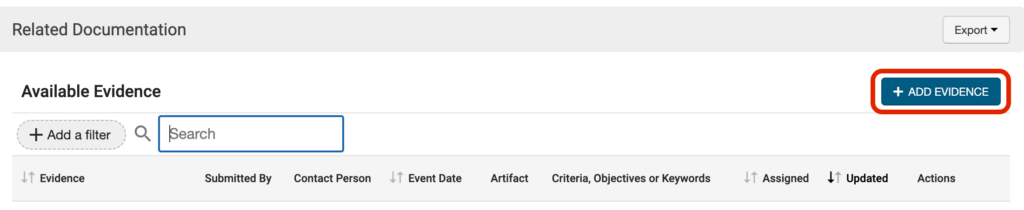
2. Inside Related Documentation, click on the blue “Add Evidence” button in the upper right corner:
3. A dialog box will open where you will be able to insert the information for your new piece of evidence. A title and description are required, but all other fields at the top are optional.
Filling in the Add Evidence Dialog Box
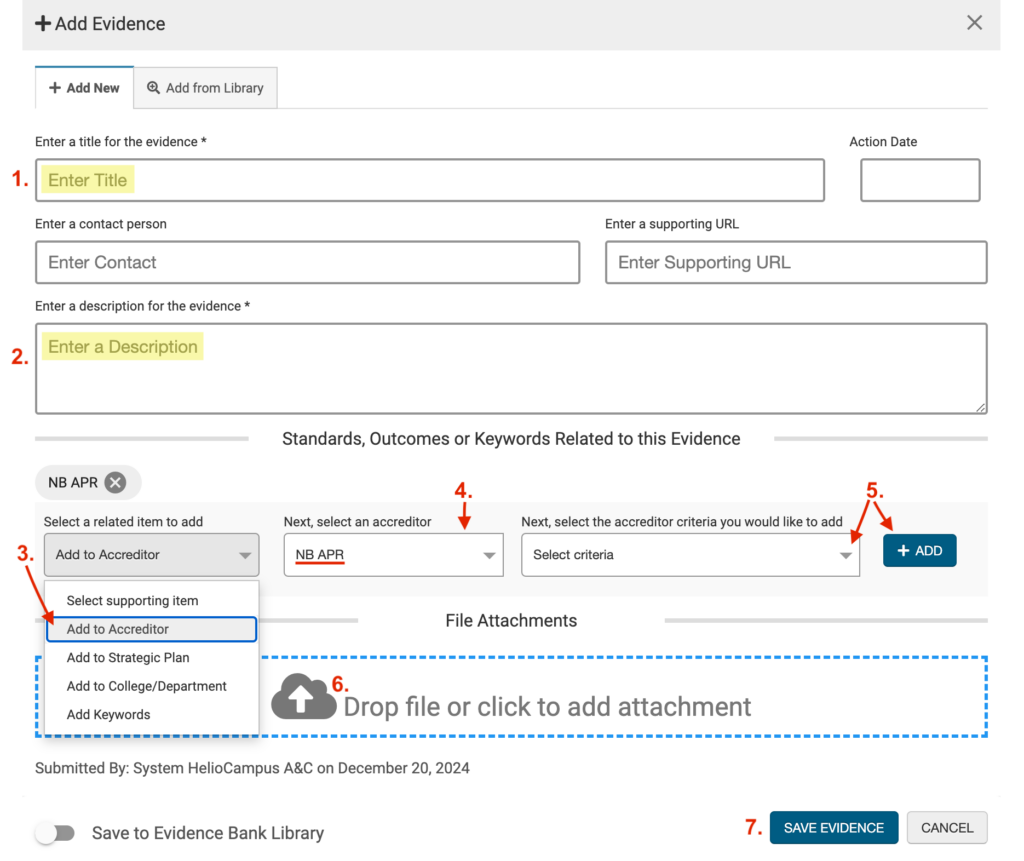
1. Enter a Title.
2. Enter a Description.
3. Click on “Select supporting item” and choose Add to Accreditor.
4. Ensure that the appropriate Self-Study (i.e. NB APR, CAM APR, RH APR, NWK APR) is selected in the box.
5. Click the Select Criteria box, choose the section where you want to add the evidence, and then click +ADD. Repeat this step as needed to add the evidence to multiple sections of the Self-Study.
6. Drag and drop a file or click to upload the supporting evidence document. Only one file can be added.
7. Click the blue SAVE EVIDENCE button at the bottom of the dialog box
After the evidence has been saved, it will be added as an available piece of evidence to the Related Documentation of the Self-Study.
2. Assigning a Piece of Evidence to the Self-Study
After the evidence has been added to the Related Documentation, it must be assigned to a section of the Self-Study for it to be available to be inserted into the Self-Study Document.
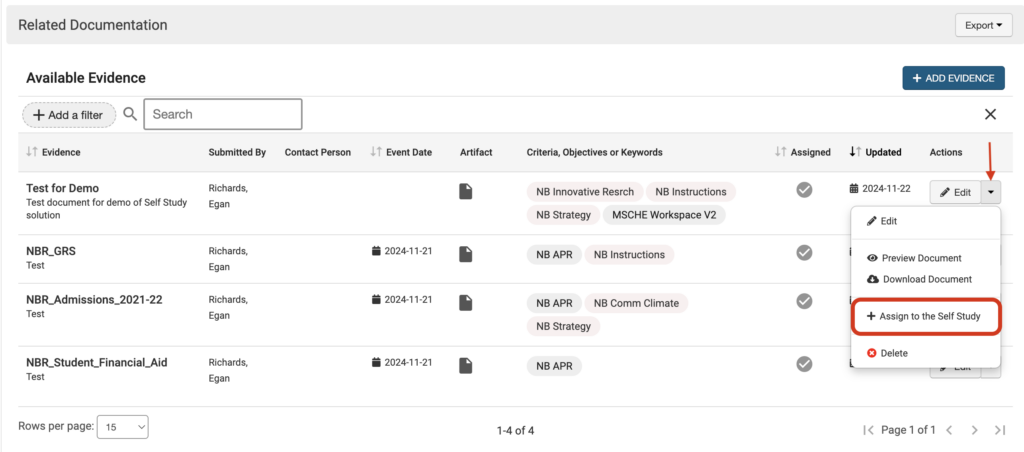
1. While still inside Related Documentation, click the arrow next to the Edit button under “Actions.” This will open a dropdown menu where you can select +Assign to the Self-Study.
The evidence will appear in the sections of the Self-Study highlighted in red under “Criteria, Objectives, or Keywords.” To add the evidence to another section, click Edit to reopen the Add Evidence dialog box and follow the steps for adding to the Accreditor and selecting criteria.
You will know the evidence was successfully assigned to the Self-Study sections once the checkmark in the “Assigned” column changes to green: 
3. Link to a Piece of Evidence in the Self-Study Document
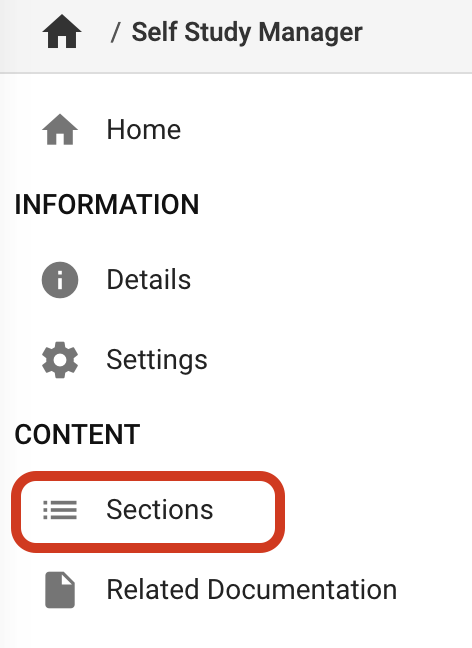
1. In the Self-Study Manager left sidebar, select Sections. This will open the Self-Study and allow you to edit the sections you have been assigned.
2. To begin editing the content of a section of the Self-Study, click on the ![]() icon for the section you wish to add the evidence to.
icon for the section you wish to add the evidence to.
3. Once the Self-Study section editor is open, place your cursor in the document where you would like the evidence to be inserted.
4. In the blue ONLYOFFICE banner at the top, select Plugins and then click on the AEFIS Smart Content plugin.

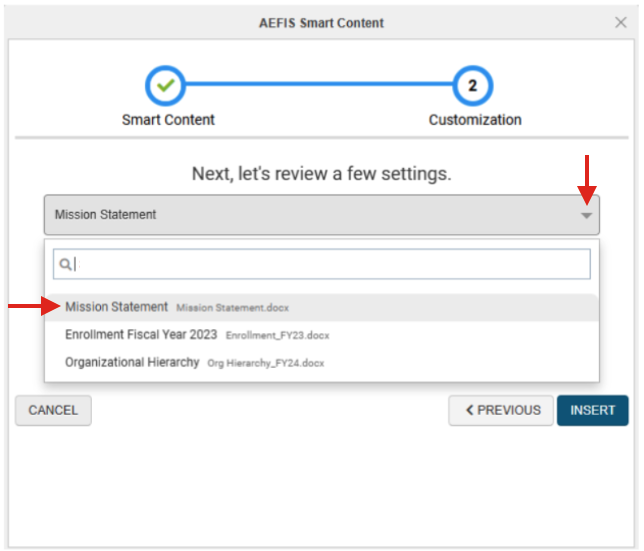
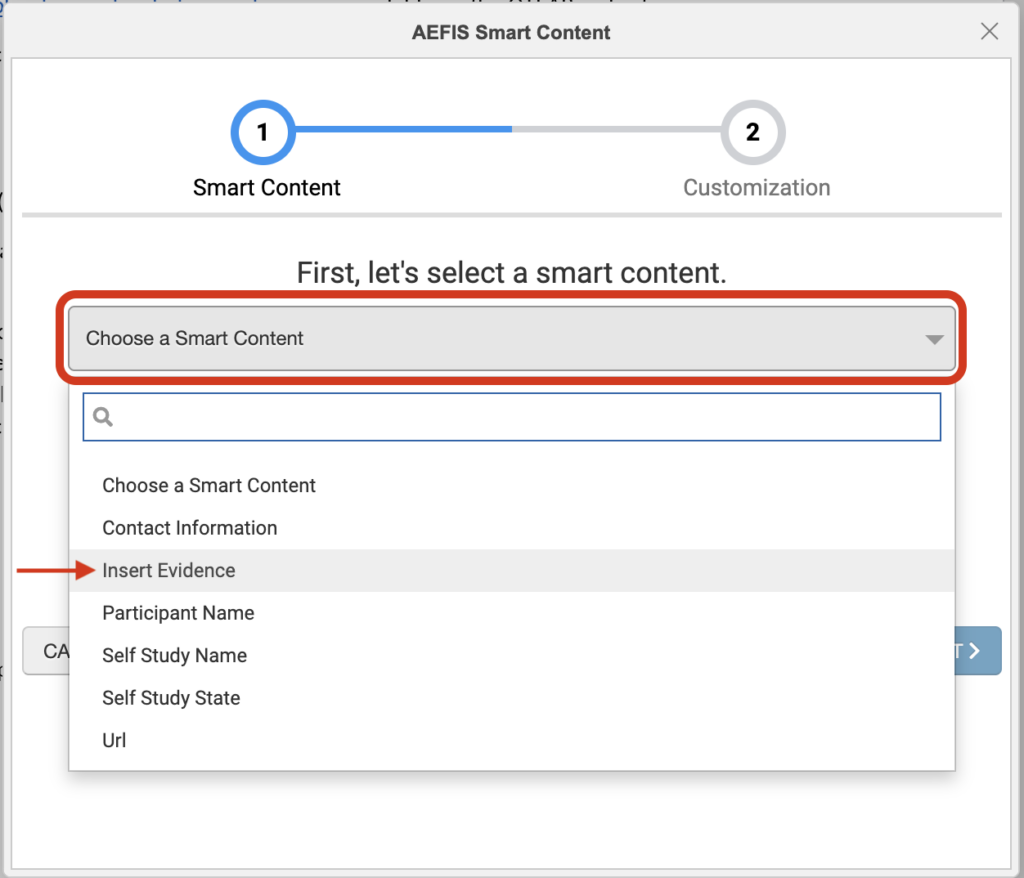
5. An AEFIS Smart Content dialog box will open. Click the box that says Choose a Smart Content to open the dropdown menu. Select Insert Evidence and then click the blue NEXT button.
6. Search for evidence by title or select the appropriate document from the dropdown list. Click INSERT to add hyperlinked text to the evidence in your Self-Study Document.